
Ingredients:
- 2 large russet potatoes
- 2 tbsp olive oil
- 1 tsp garlic powder
- 1 tsp onion powder
- 1 tsp paprika
- 1/2 tsp salt
- 1/4 tsp black pepper
- 1/4 cup shredded cheese (optional)
- Fresh parsley, chopped (for garnish)
- Sour cream or dipping sauce (optional)
Instructions:
- Prepare the Potatoes:
- Wash and dry the potatoes. Cut off a small portion of the bottom to create a flat base.
- Using a sharp knife, make cuts from the top down, leaving the base intact, about 1/8 inch apart. Rotate the potato slightly after each cut to create a “blooming” effect.
- Season the Potatoes:
- Gently separate the layers of the potato to open it up.
- Mix olive oil, garlic powder, onion powder, paprika, salt, and pepper in a small bowl.
- Brush the mixture generously over and between the potato layers.
- Air Fry:
- Preheat the air fryer to 375°F (190°C).
- Place the potatoes in the air fryer basket. Cook for 25-30 minutes, checking occasionally to ensure the layers are crisping evenly.
- Optionally, sprinkle shredded cheese over the potatoes during the last 5 minutes of cooking.
- Garnish and Serve:
- Once golden and crispy, remove the potatoes from the air fryer.
- Garnish with fresh parsley and serve with sour cream or your favorite dipping sauce.
The Ultimate Air Fryer Blooming Potatoes
The Extended Master Class Edition
The Blooming Potato (sometimes called a Potato Blossom) is a visually stunning, texturally exciting twist on a baked potato. Inspired by the famous steakhouse blooming onion, this version uses the air fryer to create hundreds of crispy edges while keeping the interior fluffy and tender.
This extended guide will walk you through the precise cutting technique—the secret to the perfect “bloom”—and provide foolproof methods for seasoning penetration and maximum crunch.
Phase 1: Meet Your Components
| Category | Ingredient | Quantity | Purpose & Substitution Notes |
| The Stars | Large Russet Potatoes | 2 | Russets are mandatory here. Their high starch content guarantees a fluffy interior and a skin that crisps beautifully. Look for smooth, oval shapes. |
| The Oil Base | Olive Oil | 2 tbsp | Avocado oil or melted butter also work. Butter adds richer flavor but burns more easily; olive oil provides the best balance of heat resistance and flavor. |
| The Savory Blend | Garlic Powder | 1 tsp | Provides foundational umami. |
| Onion Powder | 1 tsp | Adds aromatic sweetness. | |
| Paprika | 1 tsp | Essential for the golden-orange color and a subtle smokiness. (Smoked paprika is a great upgrade). | |
| Kosher Salt | 1/2 tsp | Essential enhancer. (Adjust if using table salt, which is saltier). | |
| Black Pepper | 1/4 tsp | Freshly cracked is best. | |
| The Finishers (Optional) | Shredded Cheese | 1/4 cup | Cheddar, Monterey Jack, or Gruyère melt beautifully into the layers. |
| Fresh Parsley | For Garnish | Chopped finely for freshness and color contrast. | |
| Sour Cream | For Serving | The classic tangy counterpoint. |
Phase 2: The Step-by-Step Anatomy of a Bloom
Step 1: Sanitation and Stabilization
- Action: Wash the potatoes thoroughly under cold running water using a vegetable brush to remove all dirt. Dry them completely with a lint-free towel or paper towels.
- Pro Tip: Water is the enemy of crispiness. If the potato skin is damp when it goes into the air fryer, it will steam instead of fry.
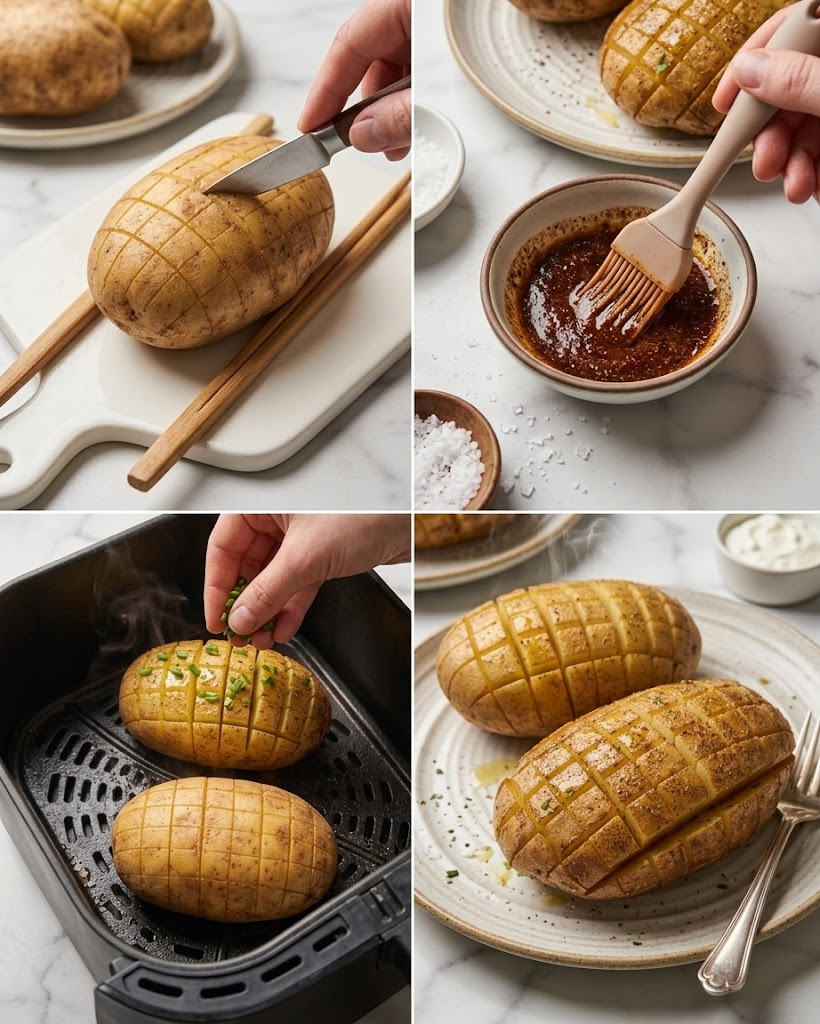
- Action: Take a very sharp knife and slice a thin, flat portion off the long bottom side of the potato. This creates a stable base so the potato doesn’t roll while you are making the intricate cuts.
Step 2: The Master Cut (The Secret to the Bloom)
- The Setup: Place the potato on your cutting board, flat-base down. You need two parallel “guides” (like chopsticks, wooden spoons, or square dowels) placed on either side of the potato base. These guides act as a knife-stop, preventing you from cutting all the way through the potato.
- The Horizontal Cuts: Starting from one end, make parallel vertical cuts about 1/8 inch apart down through the potato until your knife hits the guides. Repeat across the entire length of the potato. Do not rush this.
- The “Blooming” Rotation: Now, carefully rotate the potato 90 degrees on its base.
- The Cross-Hatch Cuts: Repeat the parallel vertical cuts (1/8 inch apart), again cutting down until you hit the guides.
- The Result: You have now created a precise grid pattern of small potato columns, all anchored by an intact, 1/2-inch-thick base.
- Validation: When you gently press down on the potato, the columns should spread slightly apart like petals—this is the “bloom.”
Step 3: Deep Seasoning Injection
- Action: In a small bowl, whisk together the olive oil, garlic powder, onion powder, paprika, salt, and black pepper.
- Action: Using a pastry brush (silicone is easiest), coat the entire exterior of the potato.
- The Crucial Technique: Now, use your fingers to gently spread the potato layers apart. Insert the pastry brush deep into the crevices, ensuring every single column is coated on all sides with the spiced oil.
- Why this matters: The oil must be inside the potato to properly fry the interior columns. If you only season the outside, the center will be bland and soft.
Phase 3: The Air Fry Process
Step 4: Preheating and Loading
- Action: Preheat your air fryer to 375°F (190°C) for 5 minutes.
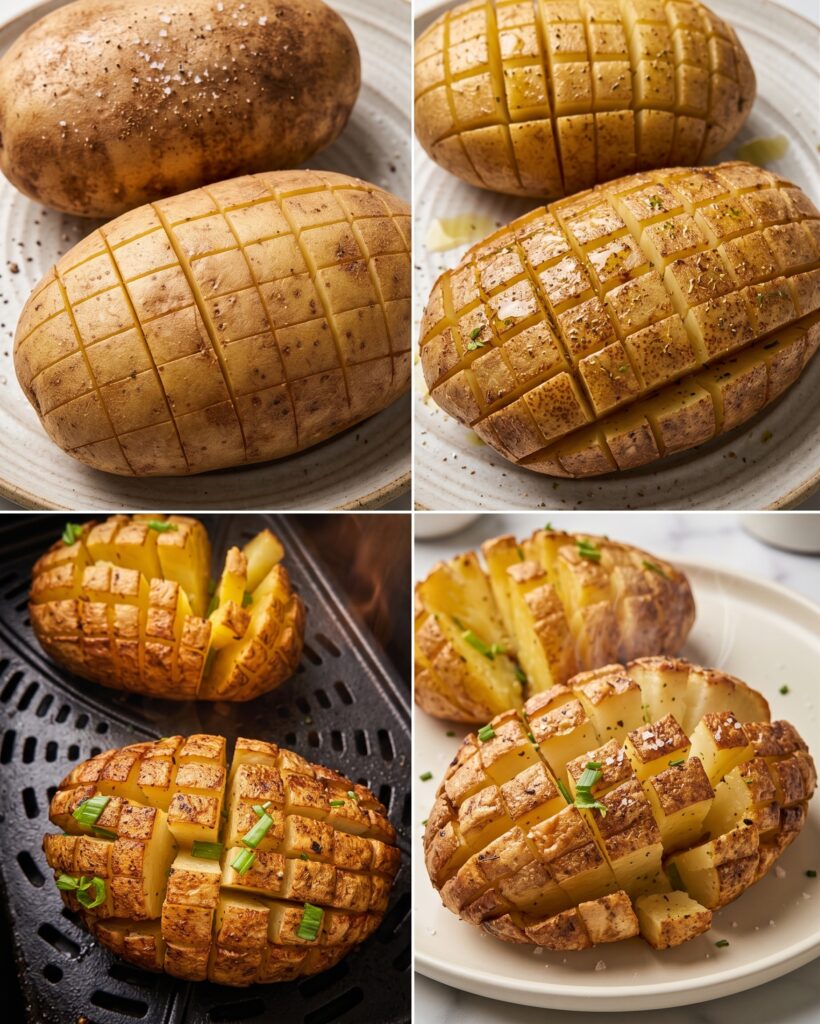
- Action: Carefully place the seasoned potatoes into the air fryer basket, ensuring they are not touching each other to allow proper airflow. They should be sitting upright on their flat bases.
Step 5: The Two-Stage Cook
- Stage 1 (Tenderizing): Cook the potatoes for 20 minutes.
- Mid-Way Check & Pro Hack: At the 20-minute mark, open the air fryer. The potato should have started to spread open. Use tongs or a fork to gently encourage the layers to separate even further. You want as much air to circulate inside the bloom as possible.
- Stage 2 (Crisping): Continue cooking for another 5–10 minutes. The exterior should be deeply golden, and the column edges should be dark brown and extremely crunchy. The potato is done when a knife inserts into the center base with zero resistance.
Step 6: The Cheese Option (Optional)
- Action: If adding cheese, sprinkle the shredded cheese generously over the potatoes, allowing it to fall into the blooming crevices.
- Action: Return to the air fryer at 375°F (190°C) for an additional 2–3 minutes, until the cheese is melted, bubbly, and slightly browned.
Phase 4: Garnish and Grand Presentation
Step 7: Final Flourish
- Action: Carefully remove the blooming potatoes from the air fryer basket using a large spatula or tongs (be gentle; they are fragile). Place them on a serving platter.
- Action: Garnish immediately with the finely chopped fresh parsley.
- Action: Serve hot. Place a generous dollop of sour cream or your favorite dipping sauce right in the center of the bloom, or serve it on the side.
Master Class Variations to Explore
Once you master the basic technique, customize your blooming potato.
- The Loaded Steakhouse Bloom: After cooking with cheese, top with crispy bacon bits, a swirl of ranch dressing, and finely sliced green onions.
- The Truffle-Parmesan Bloom: Use truffle oil instead of olive oil. For the seasoning blend, keep it simple with salt, pepper, and garlic powder. Finish the last 5 minutes of cooking with a heavy dusting of grated Parmesan cheese. Garnish with chives.
- The Smoky Southwestern Bloom: Use smoked paprika and add 1/2 tsp of chili powder and a pinch of cayenne pepper to the spice blend. Serve with chili con carne, shredded cheddar, and jalapenos.
Troubleshooting and Tips for Success
- My Potato Isn’t Crispy: Three likely culprits:
- The potato wasn’t dry before seasoning.
- You didn’t get enough oil between the layers.
- You used a smaller air fryer that overcrowded the potatoes, trapping steam. Try cooking one potato at a time if necessary.
- My Potato is Burnt on Top But Raw Inside: This happens if your potato columns are cut too thick, or if your air fryer runs hot. Try reducing the temperature to 350°F (175°C) and cooking for a longer time (40–45 minutes total).
- The Knife Went All The Way Through: Practice makes perfect. Don’t throw the potato away; you can still oil and fry the “chunks,” they just won’t be as pretty. Use the guide system (chopsticks) every time.
Storing and Reheating
- To Store: Blooming potatoes are best eaten fresh. If you have leftovers, store them in an airtight container in the refrigerator for up to 3 days. The layers will lose their crispiness.
- To Reheat: Do not use a microwave (the columns will turn mushy). The only way to save them is the air fryer. Place the leftover potato back into a 350°F (175°C) air fryer for 5–7 minutes until they are heated through and the edges have crisped up again.